
Pastel Galaxy Nail Tutorial
Sunday, January 26, 2014
Last week I posted a picture on my Instagram of my Galaxy Nail manicure and it was super popular so I've decided to do a step by step picture tutorial on how I achieve these pastel galaxy nails. The steps are the same for the classic galaxy nails but you just need to use darker colours and use a navy or black as a base.
Warning! Super pic heavy post!

I needed quite a few different shades of pastel polish for this manicure as I wanted as much detail and dimension as possible.
For the pastel galaxy manicure you will need a few shades or lilac and purple, pastel blue and pink, pink blue and purple glitters , glitter top coat and a white polish.
For the pastel galaxy manicure you will need a few shades or lilac and purple, pastel blue and pink, pink blue and purple glitters , glitter top coat and a white polish.

You will also need a top coat, cosmetic or nail art sponges( or even a clean kitchen sponge), fine nail art brush, a dotting tool and some foil or paper to use as a palette for your polish.

I started with clean bare square nails and painted two coats of my lightest shade of lilac onto my nails. The polish I used was Revlon's Lilac Pastelle 031. This will be my base for my galaxy.

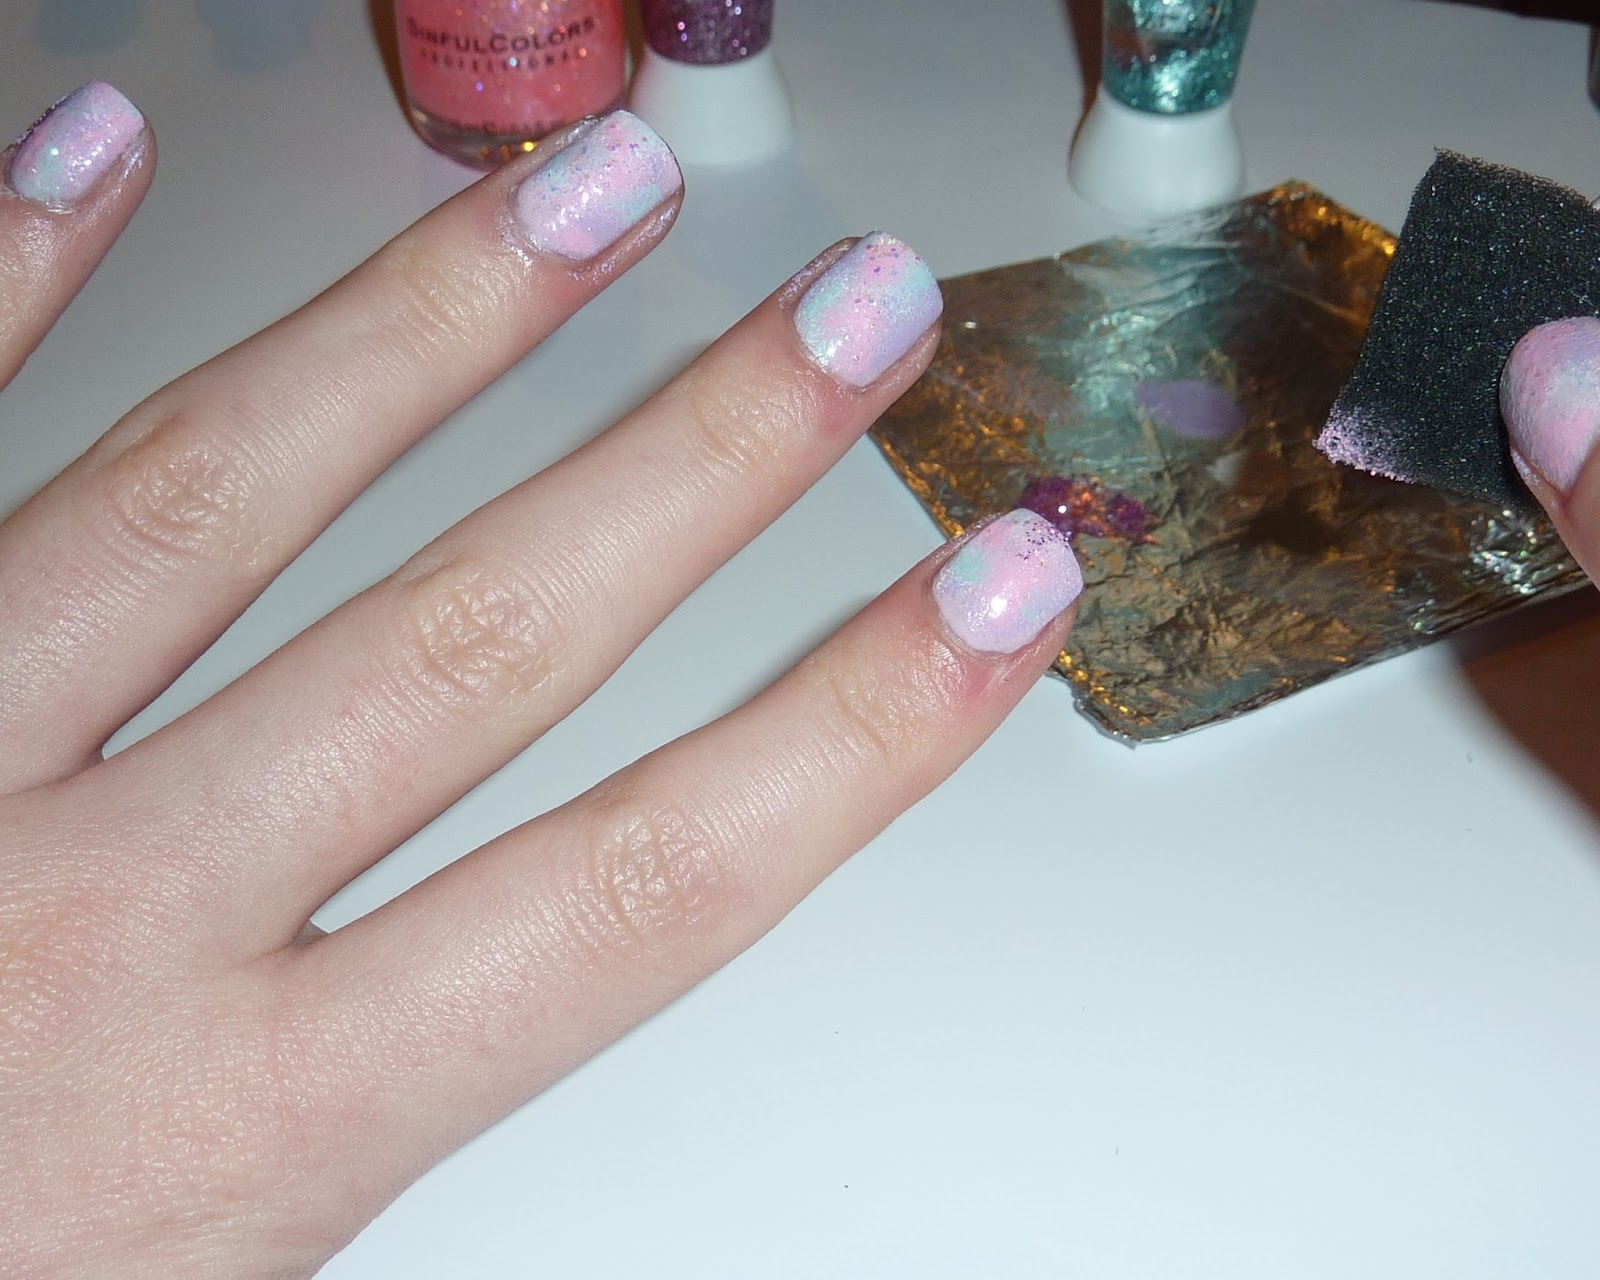
I then took a darker lilac polish George's Be Mine 34, Onto my foil polish palette as this is where I loaded my sponge with polish.

I used my Fing'rs nail art sponge for this and got a nice amount of polish on the edge of my sponge like so...

I then started to lightly sponge onto my nail to create dimension with the darker lilac and also add depth to the 'Galaxy' base.

I love the effect the dark lilac gives when sponged onto the nail. It might seam like a pointless step as I will be layering on top of it with white and the pastel shades but it makes a huge difference to the finished manicure. Also don't worry about getting polish around your nail as you will clean this up afterwards.

I then placed a small amount of white polish onto my foil palette and began to sponge onto my nail in wave shapes across my nails. The shapes I created on my nail with the white where completely random and not the same on each nail so you can be quite messy with this designs and it should still look very effective!


Once the white polish was dry it looked really nice and blended so well with the lilac base polishes.

I then went over the top of the white polish lightly with a pastel blue polish , I used 17 Mint Choc Chip for this. I sponged on top of the white polish leaving spaces for the pastel pink to be applied.

I used a very light hand and the edge of the sponge when doing this as I didn't want to add too much blue.

As you can see from the picture below there is still white areas which I can sponge the pastel pink onto.

I then placed my pastel pink onto my foil pallet, I used 17 Fairy Cake for this. I love this shade!


I love how all the pastel polishes look together and the sponge gives the finish such a nice effect!
 |
 |

I used a white polish from the OPI Little Romantics Set with my Fing'rs Small Dotting tool and Fing'rs Fine nail art brush to add small dots and crosses to create the look of stars in the galaxy.


I randomly dotted sets of 3 dots onto my nails leaving space for little + shapes on random nails.
 The Crosses and dots really add a little detail to the nails and make them a little more 'Galaxy' looking!

To finish my manicure I painted all my nails with the Glitter top coat out of my The Colour Works Polish Set.

I only added one very thin layer of the glitter as it just adds a more 'stars' and finishes the manicure nicely!

Then all that was left to do then was to clear up my edges on my nails and remove any polish from around my nails with nail polish removed and an ear bud!

I absolutely LOVE the finished manicure as its so sparkly and pretty. I know this post is super long but this manicure literally took me half hour to create and that with drying time! Its a really easy manicure and looks so effective!

This manicure would go with near enough any outfit and who doesn't love a pastel manicure this time of year? I'm sure we are all looking for a way to bust out the pastels for spring!


And if you would like the Classic Galaxy nails then the steps are the same you only need to replace the base polish for a navy or black and use darker blues,pinks and purples to create the perfect Galaxy Nails!


11 Comments
Jeez girl ! You are talented !! Im really impressed ! Thanks for the tutorial !!
ReplyDeleteI'll share it on my social medias !!
Annaïs
Thank you so much Annaïs! I'm so pleased you like the tutorial! :) Thanks for sharing, I really appreciate your support!
Deletex
Looks really lovely!
ReplyDeletex
Thank you Melissa! :)
Deletex
So cute, glad I found them on instagram.. I'm going to try some pastel galaxy when I have the time, and a free set of nails to paint! I've done the "classic" galaxy but love this spin on it. I have a question about something slightly unrelated, what is Beautylish? I went on yours and I could not figure out if it was a shop or just a place to talk about your favorite brands? It seems like something I'd be interested in joining... haha!
ReplyDeleteMuch Love,
-Stephanie Eva
www.stephanieheva.blogspot.com
Hi Stephanie!
DeleteThank you so much for your kind comment! :) x I cant wait to see your take on this manicure! hmm...Beautylish is a site which I lost of people use to post pictures and videos of their hair,make up looks and nail art so its like another social media site but for all things beauty! I think you can buy products from there also but I personally havent done that and only use it to post my pics and tutorials (but i forget to update it hehe) x Its also a beauty community so a lot of reviews to read through and forums to get involved in :) x I think youd like it! x
Hugs!
Sophie
x
Thank you so much!! Really helpful and I'll have to look into signing up! Also, I'll let you know when I get to try your nails. I have a few sets "in the queue" but hopefully it won't be too long from now ;)
DeleteMuch Love,
-Stephanie Eva
this is such a good tutorial! love love love these :) xx
ReplyDeletealex // Cats and Vodka
Thank you Alex! I'm so glad you like them :) x
DeleteLOVE LOVE LOVE LOVE THESE !
ReplyDeletemissknightbeauty.blogspot.com.au
Thank you :)
DeleteX
Thank you for commenting! I love reading your comments and will always try and reply either on this post or by visiting your blog! Want a quicker response follow me on twitter and tweet me @Sophiejenner
Sophie
x